Cavernize user guide
Grading demo content with Cavernize
Cavernize offers a useful tool for comparing the audio quality of short scenes chosen for demonstration in various aspects, such as dynamics, chest slam, and spatial presence.
Running the grading process
First, set up Cavernize for grading by checking the Quality analysis and grading option under Rendering. This will grade the content you will convert next. If you just want to grade, but not convert, check the Report only mode option.
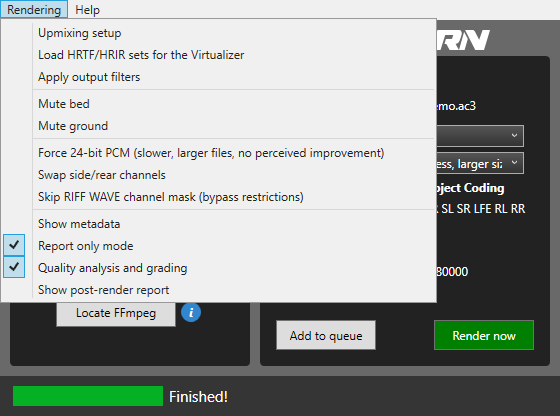
After this setup, perform the render as usual. When the render is finished, the Rendering menu's Show post-render report option will show you the numeric and graded results:
This is only an advertisement and keeps Cavern free.
Interpreting the results
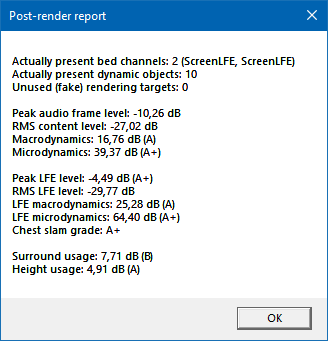
The grades from best to worst are A+, A, B, C, D, F. These are the metrics you can compare demos by:
- Macrodynamics: The dynamic range of the demo content can be determined by calculating the difference between the peak and RMS levels. A higher grade indicates that the loud effects more closely resemble their real life volumes, and are more distinct from the silent portions. In contrast, scenes with lower dynamics can sound uninteresting and lack variation. The dynamic range (and thus, sound quality) of modern movies has worsened due to a phenomenon called the "loudness war". This is because cinema-goers have been requesting lower volumes, and operators have been complying. As a result, new movies are mixed louder, gaining back the lost volume, but leading to a decreased peak volume, thus, dynamic range. This does not solve anything and actually breaks the quality of the audio.
- Microdynamics: The best dynamic range for a one-second time period, measured using a moving window. Higher grades indicate louder sudden sound effects like true-to-life gunshots, while lower grades mean that the audio gradually gets louder if the overall dynamics are good. Microdynamics generally indicate the level of detail in the sound, with higher grades having less distortion and compression. When the lower end of main channels is well used, good microdynamics can make up for a lower score in chest slam effects.
- Peak LFE level: One element of a good chest slam. A powerful slam should be both loud and short, and this category measures the loudness.
- LFE macrodynamics: How well the sound mixer used the Low-Frequency Effects (LFE) channel. If the scene only makes a loud humming noise, it would get a lower grade.
- LFE microdynamics: Another element of a good chest slam. Microdynamics is a good indicator of slam speed.
- Chest slam: The final grade for chest slam quality is determined by taking the lower value between Peak LFE level and LFE microdynamics.
- Surround usage: The RMS of all surrounds including the heights, compared to the entire track's RMS level.
- Height usage: The RMS of all heights, compared to the entire track's RMS level.